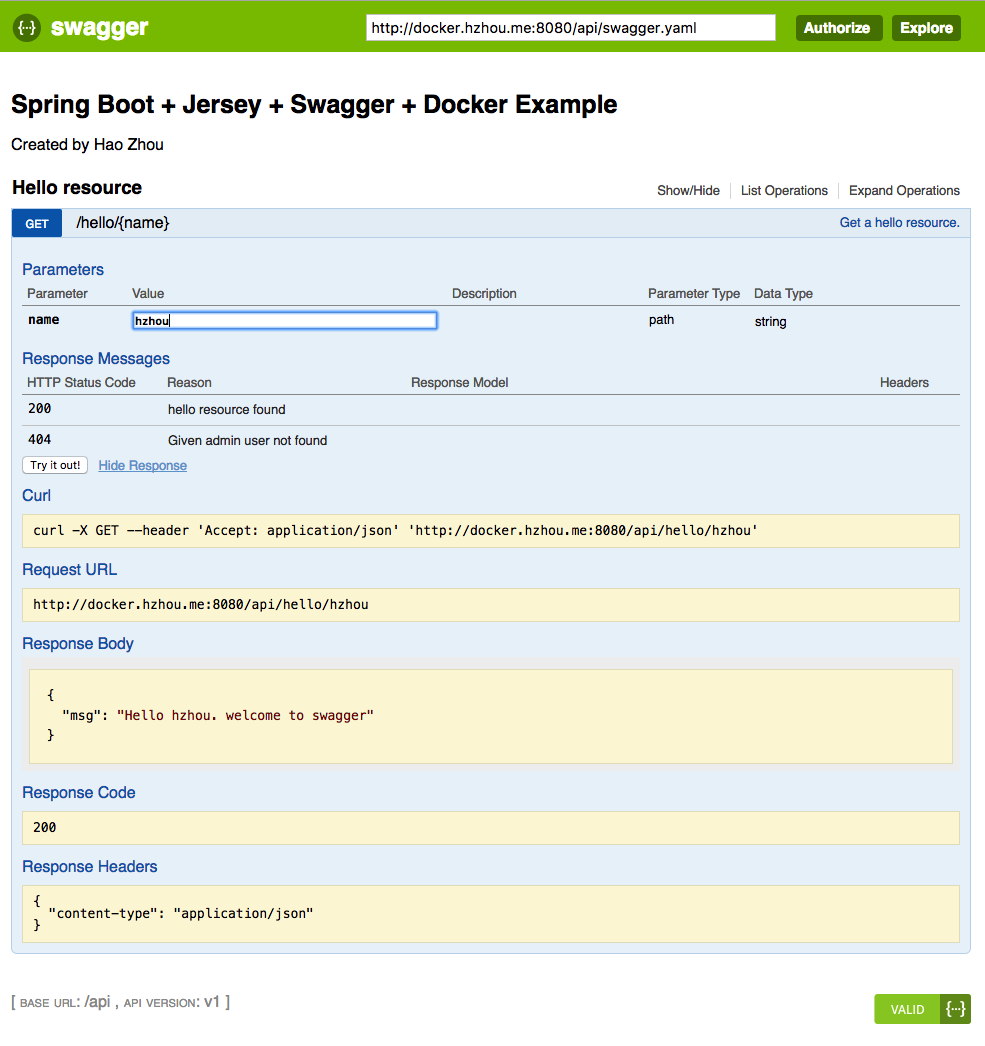
在做服务器端API开发的时候,如何保持文档的更新是一个比较头疼的问题。试过写成word文档,缺点很明显:
更新不及时
不便于查阅
也试过用其他的在线API管理工具,太懒了,总是无法保持更新。而且大多数服务还是收费的。
最近一次,我在试用EOApi ,终于被它的访问速度打败了(貌似这个对path parameter支持的也不是很好),我不得不寻找新的工具。
至于为什么最后会选择Swagger,我已经记不清了。其实对于Swagger我一直是有耳闻的,只是一开始我玩弄Swagger Editor的时候,我以为它只能从YAML/JSON生成Java代码的呢。没想到居然反着也行。
长话短说,在此就简单介绍一下如果做Swagger, Spring-Boot和Jersey的快速集成。
(其实我是根据这个链接来学习的: 点我 )
1. 建一个Spring-Boot的项目,添加必要的依赖 1 2 3 4 5 6 7 8 9 10 11 12 13 <dependency > <groupId > org.springframework.boot</groupId > <artifactId > spring-boot-starter-jersey</artifactId > </dependency > <dependency > <groupId > org.springframework.boot</groupId > <artifactId > spring-boot-starter-web</artifactId > </dependency > <dependency > <groupId > io.swagger</groupId > <artifactId > swagger-jersey2-jaxrs</artifactId > <version > ${swagger.version}</version > </dependency >
2. 配置Jersey和Swagger Note: MapperObject, 所以你如果要让你的Model/Entity显示为SNAKE_CASE,你需要加上
1 io.swagger.util.Json.mapper().setPropertyNamingStrategy(PropertyNamingStrategy.SNAKE_CASE);
但是这也会导致一个问题,如果你以http://127.0.0.1:8080/swagger.json来获取内容,你会发现那些basePath和operationId也变成了SNAKE_CASE,Swagger-UI会报错。
其实这个时候你只要换成http://127.0.0.1:8080/swagger.yaml一切就妥妥的了。
Note: Spring-boot中,所有的Jesey的EndPoint必须一个个添加,不能直接package(XXX)之类的,Spring-boot官方文档有提到,我之前踩过这个坑。
1 2 3 4 5 6 7 8 9 10 11 12 13 14 15 16 17 18 19 20 21 22 23 24 25 26 27 28 29 30 31 32 33 34 35 36 37 38 39 40 41 42 43 44 45 46 47 @Component public class JerseyConfig extends ResourceConfig { @Value("${spring.jersey.application-path:/}") private String apiPath; public JerseyConfig () { this .registerEndpoints(); } @PostConstruct public void init () { this .configureSwagger(); } private void registerEndpoints () { this .register(HelloWorldResource.class); this .register(WadlResource.class); } private void configureSwagger () { this .register(ApiListingResource.class); this .register(SwaggerSerializers.class); BeanConfig config = new BeanConfig (); config.setConfigId("springboot-jersey-swagger-docker-example" ); config.setTitle("Spring Boot + Jersey + Swagger + Docker Example" ); config.setVersion("v1" ); config.setContact("Hao Zhou" ); config.setSchemes(new String []{"http" , "https" }); config.setBasePath(this .apiPath); config.setResourcePackage("me.hzhou.resource" ); config.setPrettyPrint(true ); config.setScan(true ); } }
3. 添加HelloWorld resource Note: @SwaggerDefinition这里面不是必要的,我加在这里只是为了提示Swagger有security方面的注解
1
2
3
4
5
6
7
8
9
10
11
12
13
14
15
16
17
18
19
20
21
22
23
24
25
26
27
28
29
30
31
32
33
34
@Component @Path("/") @Consumes(MediaType.APPLICATION_JSON) @Produces(MediaType.APPLICATION_JSON) @Api(value = "Hello resource", produces = "application/json") @SwaggerDefinition(securityDefinition = @SecurityDefinition(apiKeyAuthDefintions = { @ApiKeyAuthDefinition(key = "basic", name = "Authorization", in = ApiKeyAuthDefinition.ApiKeyLocation.HEADER) })) public class HelloWorldResource { private static final Logger LOGGER = LoggerFactory.getLogger(HelloWorldResource.class); @GET @Path("hello/{name}") @ApiOperation( value = "Get a hello resource." , response = Hello.class //,responseContainer = "List" // if returned is a list of objects //,authorizations = @Authorization(value = "basic") ) @ApiResponses(value = { @ApiResponse(code = 200, message = "hello resource found"), @ApiResponse(code = 404, message = "Given admin user not found") }) public Response getHelloVersionInUrl (@ApiParam @PathParam("name") String name) { if ("404" .equals(name)) { return Response.status(Response.Status.NOT_FOUND).build(); } Hello result = new Hello (); result.setMsg(String.format("Hello %s. %s" , name, "welcome to swagger" )); return Response.status(Response.Status.OK).entity(result).build(); } }
4. 最后借助Swagger-UI来显示我们的API文档
5. 后续 其实我还没有整明白如果实现http-header的basic authorization。等我哪天知道了再过来更新。
6. 源码 swagger-spring-boot-jersey
